If you are an
instructor at EngravingClasses.com
or an AirGraver owner and you would like to write tutorials to be included on this page,
please email today.
On-Demand Engraving Tutorials
The "On-Demand" tutorials will automatically take you through paypal for payment. After payment you will receive access to the tutorial
you purchased for 30 days. You may print the tutorial and keep it for a personal reference.
|
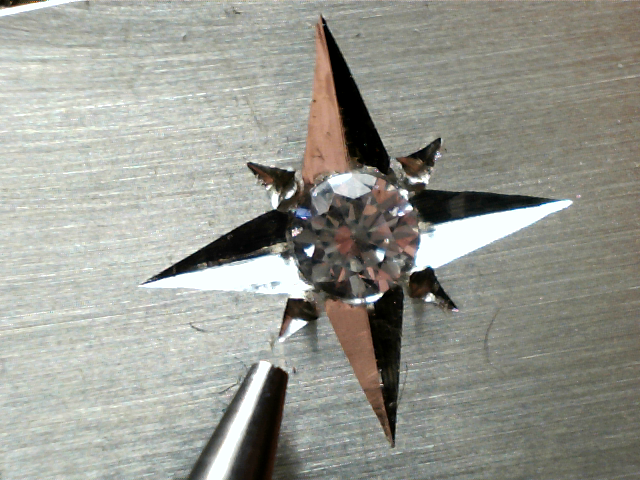
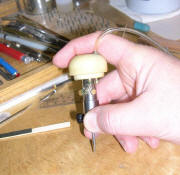
Star set
pave tutorial - by Jan Hendrik Viljoen(Beginner
level)
This step by step tutorial
is aimed at teaching novice gem setters the
basic skills needed in pave setting. The
tutorial covers all the tools and materials
needed, techniques and handy tips. The easy to
follow steps will guide you to do neat,
professional setwork and be a platform from
which more in depth pave setting techniques can
be learned.
2750 words, 28 images
Star set pave (beginners pave tutorial) by
Jan Hendrik Viljoen
Price $12
Purchase by selecting the
tutorial here
After purchase you will be able to see the tutorial at this link.
Star set pave (beginners pave tutorial)
|
|
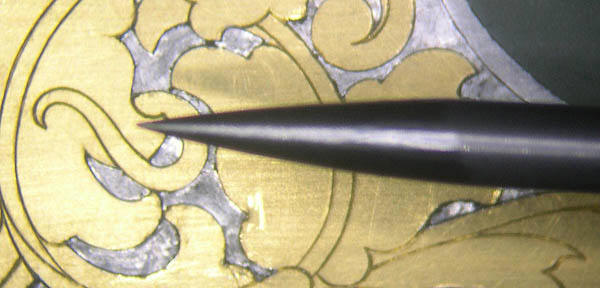
Selective
French Grey Tutorial - Ray Cover
This tutorial takes you step by step through
Ray's process for doing selective french gray on
an engraved and blued object. He discusses the
tools and materials, where to get them, how to
do the procedure, as well as alternative methods
for doing the french grey manually without the
pen plating set up.
3454 words, 21 images
Selective French Grey Tutorial
Price $20
Purchase by selecting the
tutorial here
After purchase you will be able to see the tutorial at this link.
Selective French Grey Tutorial
|
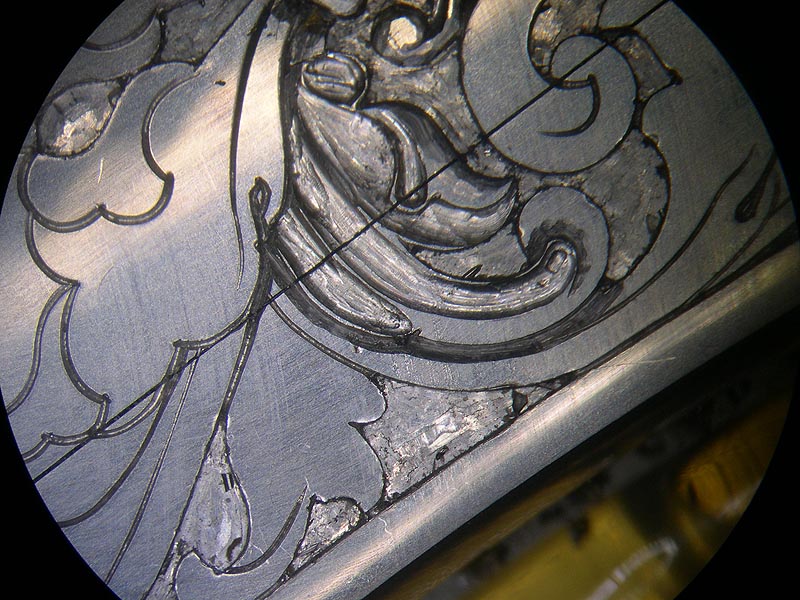
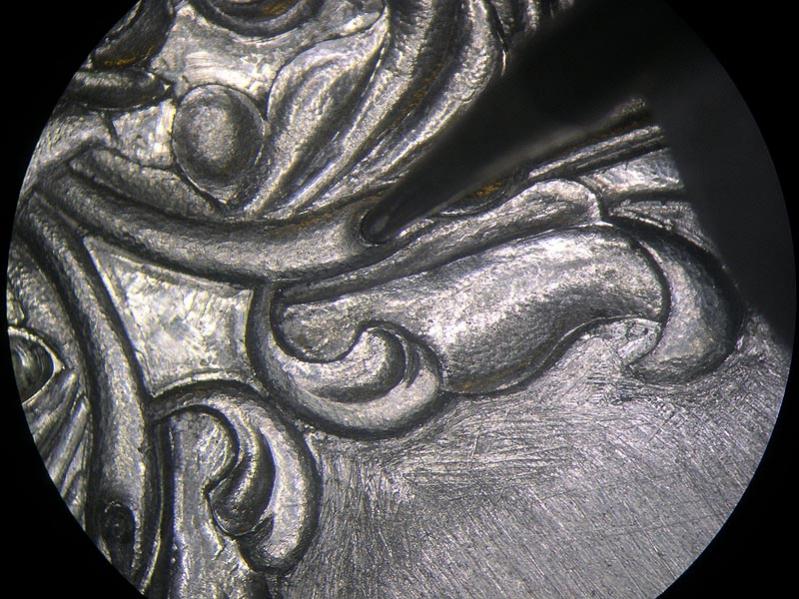
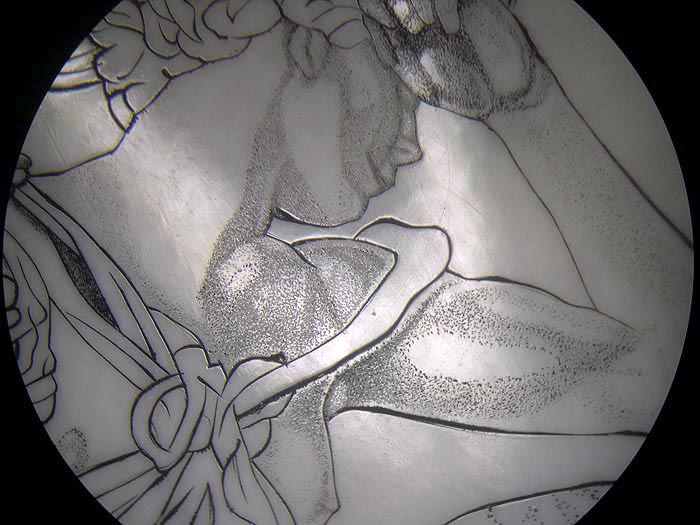
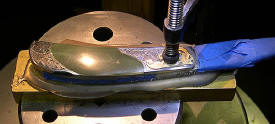
Sculpted engraving step by step tutorial - Ray
Cover
This tutorial takes you step by
step through Ray's process of creating sculpted
scrolls that he used on his Dante's Inferno
theme knife. This covers the tools needed as
well as the step by step methods. Ray used a
three step process for this sculpting. The
initial carving with gravers, refining the shape
with punches, and finishing with stones and
polish. All three of these procedures are
covered in detail. Ray also gives a short
description of alternative methods. You also
get to see how to create the raised domed panels
for doing bulino scenes or other engraving on.
 Please
note that this tutorial covers the sculpting
portion of this project only. The bulino part
of the project is not included. Please
note that this tutorial covers the sculpting
portion of this project only. The bulino part
of the project is not included.
5618 words, 75 images
Sculpted engraving step by step tutorial
Price $25
Purchase by selecting the
tutorial here
After purchase you will be able to see the tutorial at this link.
Sculpted engraving step by step tutorial
|
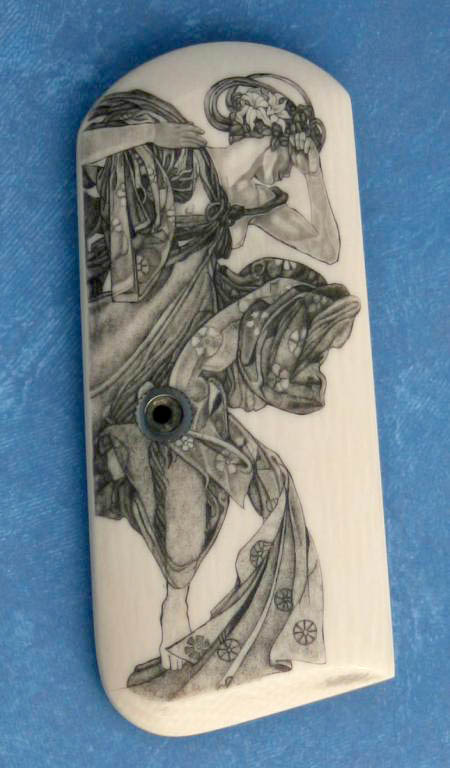
3387 words, 45 images
How to Scrimshaw with an Airgraver
Price $20
Purchase by selecting the
tutorial here
After purchase you will be able to see the tutorial at this link.
Ray Cover's
How to Scrimshaw with an AirGraver
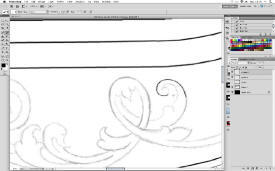
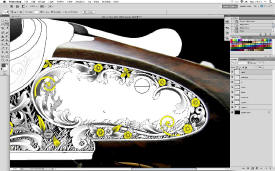
Learning to design an engraving layout with Photoshop
by Roland Baptiste (French and English versions)
approx. 1200 words, 85 images
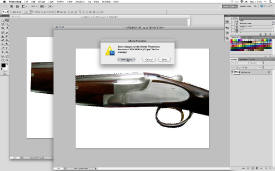 In
this tutorial I will show you the way to create step by step a drawing project like it isn't possible with a pencil. You will learn the
essentials tools to use Photoshop in this kind of work. This tutorial can be apply on all works and projects. Here, I show you a gun
drawing but it is the same proceed for a knife, pen,... everything else. I have learned to draw and engrave In
this tutorial I will show you the way to create step by step a drawing project like it isn't possible with a pencil. You will learn the
essentials tools to use Photoshop in this kind of work. This tutorial can be apply on all works and projects. Here, I show you a gun
drawing but it is the same proceed for a knife, pen,... everything else. I have learned to draw and engrave
 with
the classics (old) methods and techniques like you always learn today in the school. I think the new technology is the way to following when
it is to make better work and only if it is better and here it is incomparable in the finesse and property work finish. It isn't because you
use the computer, binocular or AirGraver that it isn't a hand made, it is just an other way to create what you want with with
the classics (old) methods and techniques like you always learn today in the school. I think the new technology is the way to following when
it is to make better work and only if it is better and here it is incomparable in the finesse and property work finish. It isn't because you
use the computer, binocular or AirGraver that it isn't a hand made, it is just an other way to create what you want with
 the
best quality that you can obtain without machine. It is the logic evolution of the hand engraving and it is the progress for the best... like
I love it. Roland Baptiste the
best quality that you can obtain without machine. It is the logic evolution of the hand engraving and it is the progress for the best... like
I love it. Roland Baptiste
Frency
Dans ce tutoriel je vous montrerai le chemin à suivre pour créer pas à pas un projet de gravure sous forme de dessin comme il n'est pas
possible de le faire avec un crayon et du papier.
Vous apprendrez à maîtriser les outils essentiels pour utiliser Photoshop dans ce genre de travail. Ce tutoriel peut être appliqué sur tous
travaux et projets. I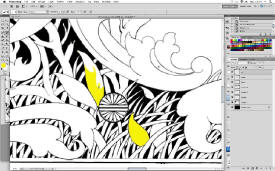 ci,
je vous montre un dessin sur un fusil mais c'est le même procédé pour un couteau, stylo,etc... J'ai appris à dessiner et graver avec les
méthodes et techniques classiques (vieilles) comme vous l'apprenez toujours aujourd'hui à l'école. ci,
je vous montre un dessin sur un fusil mais c'est le même procédé pour un couteau, stylo,etc... J'ai appris à dessiner et graver avec les
méthodes et techniques classiques (vieilles) comme vous l'apprenez toujours aujourd'hui à l'école.
Je pense que les nouvelles technologies sont le chemin à prendre lorsque c'est pour réaliser un meilleur travail et seulement dans ce cas; et
ici, c'est incomparable au niveau de la finesse et de la propreté du travail. Ce n'est pas parce que vous utilisez un ordinateur, binoculaire
ou l'airgraver que ce n'est pas du travail fait main, c'est juste une autre voie pour créer ce que vous voulez avec une des meilleures
qualités que vous savez obtenir sans machine. C'est la logique de l'évolution de la gravure main et c'est le progrès pour le meilleur... comme
je l'aime.
Approx. 1200 words, 85 images
Learning to design an engraving layout with Photoshop by Roland Baptiste (Access to both French and English versions) -
Price $25
Purchase by selecting the
tutorial here
After purchase you will be able to see the tutorial at this link.
Roland Baptiste's Tutorial Learning to design an engraving
layout with Photoshop (French and English versions)
Note: Roland's tutorial above is included inside his book
"Learning Gun Engraving".
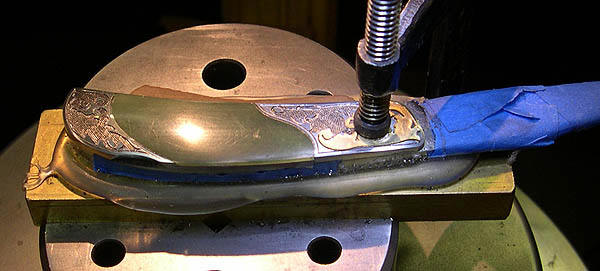
Ray Cover's knife engraving step by step through a project
 Ray
Cover's step by step knife engraving process. Follow me through an actual project step by step. The purpose of this tutorial is ti
show the process that I go through Ray
Cover's step by step knife engraving process. Follow me through an actual project step by step. The purpose of this tutorial is ti
show the process that I go through
when engraving a knife. I cover every step from start to finish.
I start with what to do with the knife when it arrives at the studio
and move on from there including how to prep the knife for engraving,
how I get the outline for the design, my drawing process for the
design, transfer of the design, cutting the initial outline, etc,
etc, all the way through the process of this knife project.
 The tutorial
ends with a photo of the finished knife and a jpeg of the transfer I used for the engraving (that can be printed out and used for practice if
you wish). I also give photos and info on some of the specialty tools I use along the way. The tutorial
ends with a photo of the finished knife and a jpeg of the transfer I used for the engraving (that can be printed out and used for practice if
you wish). I also give photos and info on some of the specialty tools I use along the way.
This tutorial is knife specific and deals directly with the process for engraving a custom handm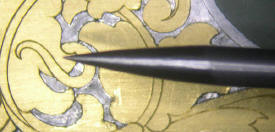 ade
knife. It is not a general engraving tutorial where I teach you how to sharpen a graver, make a
cut, cut a scroll etc. I have another tutorial here on shading. Those same principles of shading were used in this tutorial. I have
tutorials on gold inlay, tool sharpening, etc. in the works that I hope to have available soon. While all those skills are shown here I do
not follow those side topics in detail here. Here we are dealing with the process and procedures I use to engrave custom knives. ade
knife. It is not a general engraving tutorial where I teach you how to sharpen a graver, make a
cut, cut a scroll etc. I have another tutorial here on shading. Those same principles of shading were used in this tutorial. I have
tutorials on gold inlay, tool sharpening, etc. in the works that I hope to have available soon. While all those skills are shown here I do
not follow those side topics in detail here. Here we are dealing with the process and procedures I use to engrave custom knives.
I hope you enjoy it, Ray
3025 words, 83 images
Knife engraving step by step through a project -
Price $30
Purchase by selecting the
tutorial here
After purchase you will be able to see the tutorial at this link.
Ray Cover's knife engraving step by step through a project
 Basic
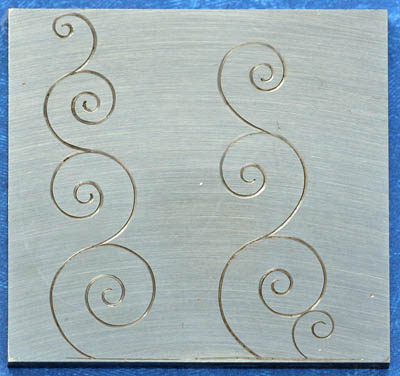
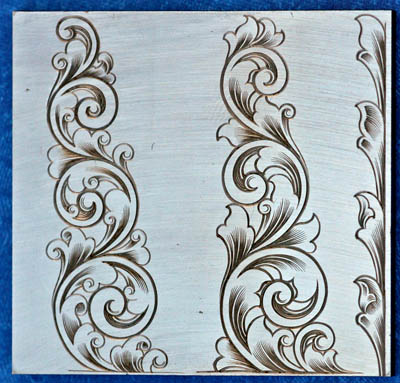
scroll shading for traditional scrolls by Ray Cover Basic
scroll shading for traditional scrolls by Ray Cover
This tutorial takes the learner step by step through Ray's method of
shading as it is applied to basic scroll forms. In this tutorial Ray
shows you how to use his shading method to shade both a Nimschke type and a McKenzie type scroll.
Approx.
2800 words, 23 images.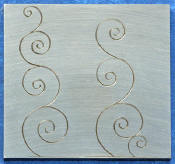 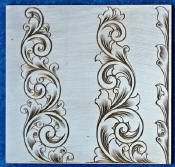
 Basic
Scroll Shading for
Traditional Scrolls -
Price $20 Purchase by selecting the
tutorial here Basic
Scroll Shading for
Traditional Scrolls -
Price $20 Purchase by selecting the
tutorial here
After purchase you will be able to see the tutorial at this link.
Ray Cover Scroll Shading Tutorial
About Ray Cover
Ray Cover is an engraver of fine firearms who also has a following of people who collect his work in the high end knife, pen and fly rod
markets. Ray teaches classes in his studio in Festus, Missouri.
Visit http://EngravingClasses.com for Ray's scheduled classes
Click here for Ray's Engraving photo gallery on his website
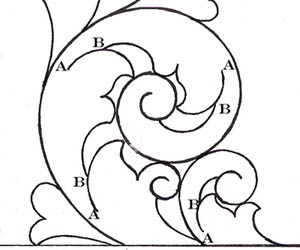
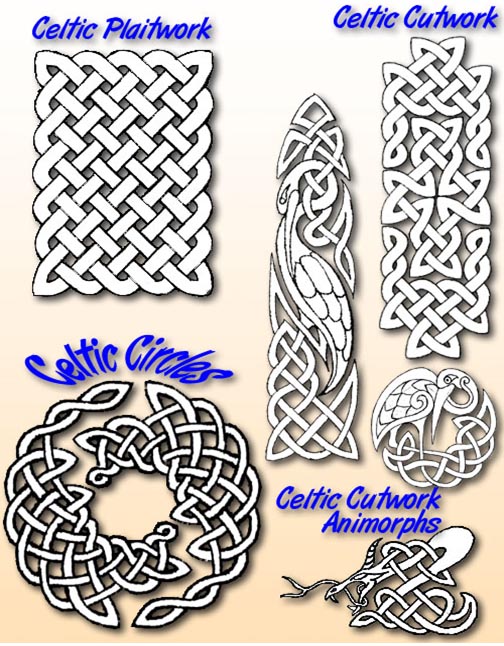
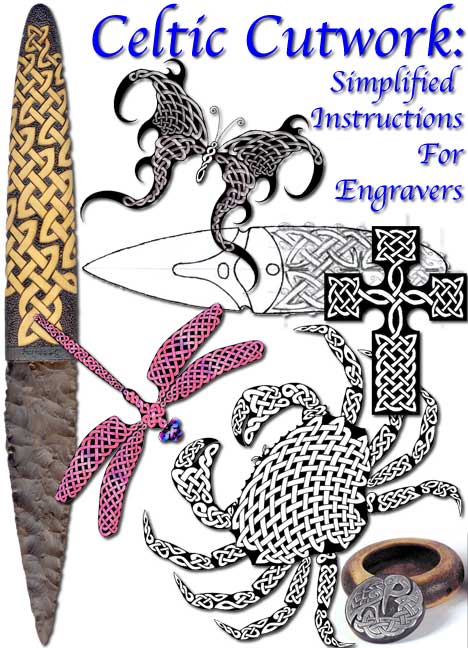
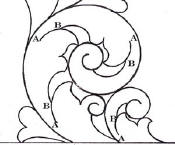
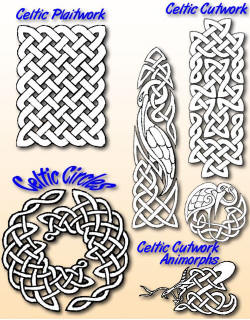 Celtic
Line Drawing for Engravers, by Tom Sterling From its roots in
the mysterious and unwritten distant past of Celtic art and ornament, Tom Sterling provides a series of tutorials on Celtic Line Drawing,
concentrating on contemporary methods designed for engravers. You don’t need to know how to draw or have well-developed artistic
skills to be a complete success. These methods are simple, yet provide spectacular results -
YOU CAN DO THIS! Celtic
Line Drawing for Engravers, by Tom Sterling From its roots in
the mysterious and unwritten distant past of Celtic art and ornament, Tom Sterling provides a series of tutorials on Celtic Line Drawing,
concentrating on contemporary methods designed for engravers. You don’t need to know how to draw or have well-developed artistic
skills to be a complete success. These methods are simple, yet provide spectacular results -
YOU CAN DO THIS!
Needing nothing more than pencil, paper and a desire to learn, you can create complex Celtic designs in
a very short time - hours, not days or weeks.
 Part
1: Celtic Plaitwork is
available for free, and is the basis for the following Part 2: Celtic
Cutwork, and Part 3: Celtic Circles. If you enjoy Part 1: Celtic Plaitwork, then you’re ready for the far more
spectacular results in Part 2 and Part 3. Part
1: Celtic Plaitwork is
available for free, and is the basis for the following Part 2: Celtic
Cutwork, and Part 3: Celtic Circles. If you enjoy Part 1: Celtic Plaitwork, then you’re ready for the far more
spectacular results in Part 2 and Part 3.
Part 1: Celtic Plaitwork will teach the basic method of
“weaving” through a simple system of circles and lines, creating
blocks of perfectly woven Celtic ribbons. Part 1 is free
Click Here to view
Part 2: Celtic Cutwork explores the heart of contemporary Celtic
interlaced ribbons, extending the system of circles and lines. Cutwork is where Celtic Line Drawing
comes alive. We’ll also develop Celtic patterns, fitting them on knife shapes for engraving, and
discovering simple methods for using computer illustration
programs like Photoshop for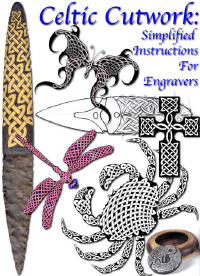 cleaning up, scaling and fitting our drawn and scanned images for transfer to metal. In addition,
we’ll develop Celtic Animorphs (animal images) using these contemporary Celtic techniques. And,
finally, we’ll examine how to develop Celtic borders and develop
engraving strategies for optimum cutting.
cleaning up, scaling and fitting our drawn and scanned images for transfer to metal. In addition,
we’ll develop Celtic Animorphs (animal images) using these contemporary Celtic techniques. And,
finally, we’ll examine how to develop Celtic borders and develop
engraving strategies for optimum cutting.
Part 3: Celtic Circles will extend even further our simple line
drawing concepts. We’ll create circular Celtic designs and find out how to work our circular designs into ovals. We’ll examine how to draw
Celtic designs directly on complex 3-dimensional surfaces, ready for engraving.
Approx. 9000 words (counting all three parts) approx. 100 images in parts 2 and 3 combined.
Parts 2 and 3 or Celtic Line Drawing for Engravers
- Price $10 Purchase
by selecting the tutorial here
After purchase you will be able to see the tutorial at this
link.
Celtic Line Drawing Tutorial
If you are an
instructor at EngravingClasses.com
or an AirGraver owner and you would like to write tutorials to be included on this page,
please email today.
Note: Please do not copy the on-demand tutorials by electronic means for the purpose of sharing or you may loose access to future
tutorials. The instructors have made these tutorials for the person who purchases it only. Thank you.
Sister Sites
AirGraver.com
EngravingClasses.com
EngravingSchool.com
MasterEngravertools.com
EngravingForum.com
EngravingGlossary.com
EngravingArtist.com
|
|
|